Installation guide
- We always recommend installing your router in an open space. This helps not only to ensure optimal Wi-Fi signal but also to avoid overheating.
- Avoid pinching the fibre optic cable in the door of the distribution panel.
- You should install your router in a central space in your home. Consider using a 15m fibre optic cable to facilitate this.
- Place the router horizontally, and in a high position if possible. This ensures the signal isn’t blocked by furniture.
- Avoid placing your router:
- Behind or under a TV set
- Behind or in furniture
- Generally, in an enclosed space
- Near electronic devices, including phone cradles and microwaves
- Near an aquarium
- All of these factors can impact Wi-Fi signal.
- Take note of the fact that concrete walls and floors as well as metal will block the signal.
- If you don’t have good signal everywhere, consider equipping your home with Wi-Fi repeaters.
Before starting the setup of your new Fiber Box X6, please take the following steps: 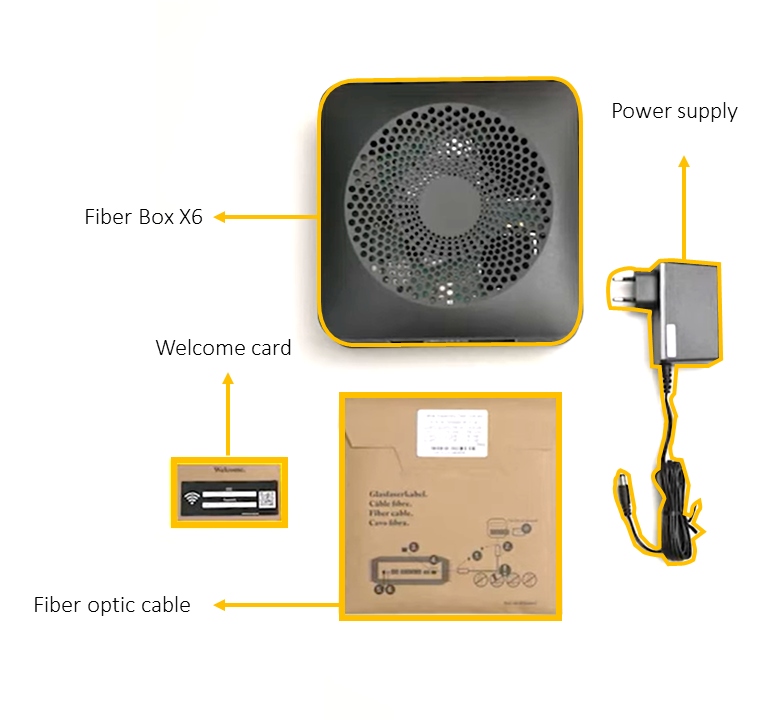
- Ensure your fiber-optic line is active. You will receive an email (subject: Salt Home – Activation of your connection and services) when your services are activated, and you can always check the order status on my.salt.ch.
- Check to make sure the box contains the following:
- Fiber Box X6 (black box)
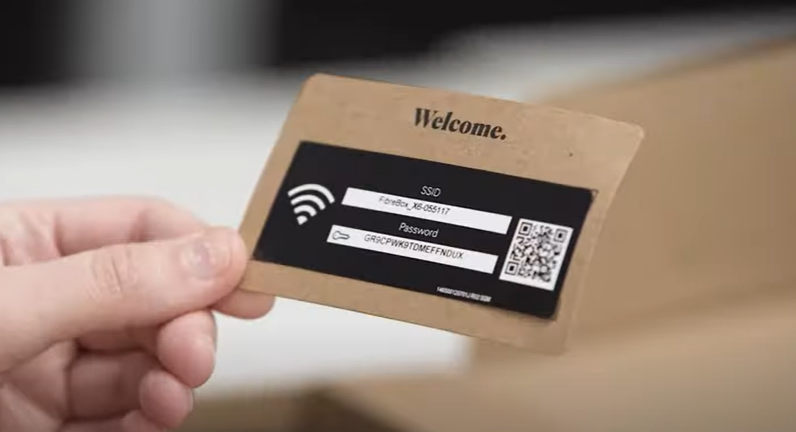
- Welcome card with Wi-Fi connection information
- Fiber-optic cable
- Power supply
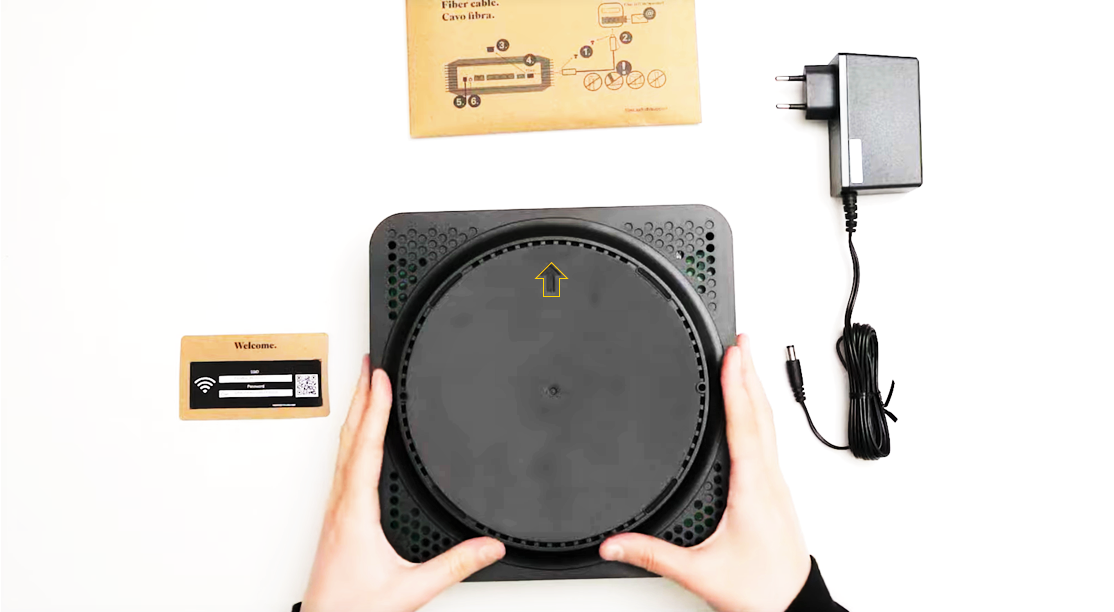
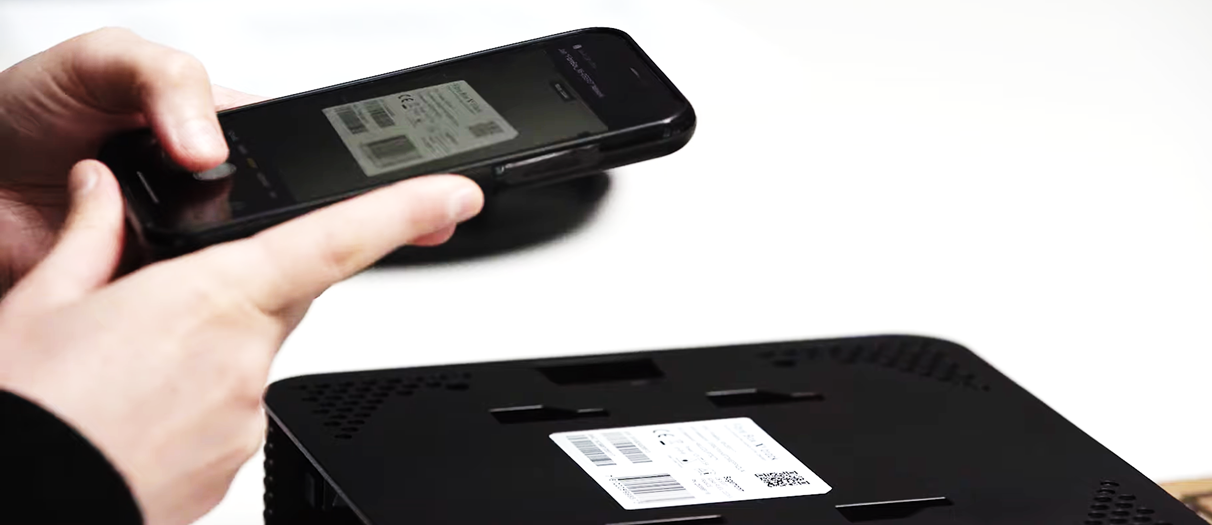
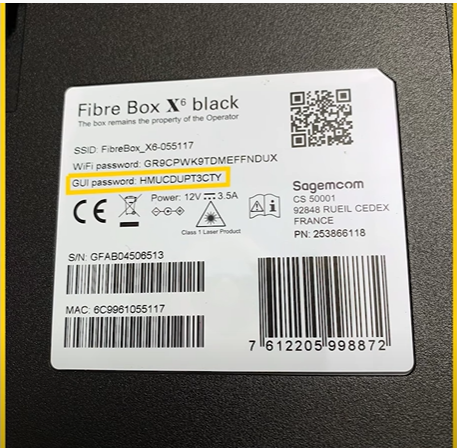
- To configure your Fiber Box via your computer’s administrator console and to avoid moving it once it’s installed, take a picture of the identifiers (admin interface password) at the bottom of the Fiber Box. To do so, turn the box upside down and push the base in the direction of the arrow. Once you’re done, place the base back on the Fiber Box.
- Next, take the fiber-optic cable. This cable must be handled very carefully, as it is extremely fragile. If it is bent, the fiber inside will break and will prevent internet access. You should place your Fiber Box close to the fiber-optic outlet to minimize the risk of damage. Never:
- Bend the cable
- Place it in a transit location
- Run it under a door
- Place it in a corner.
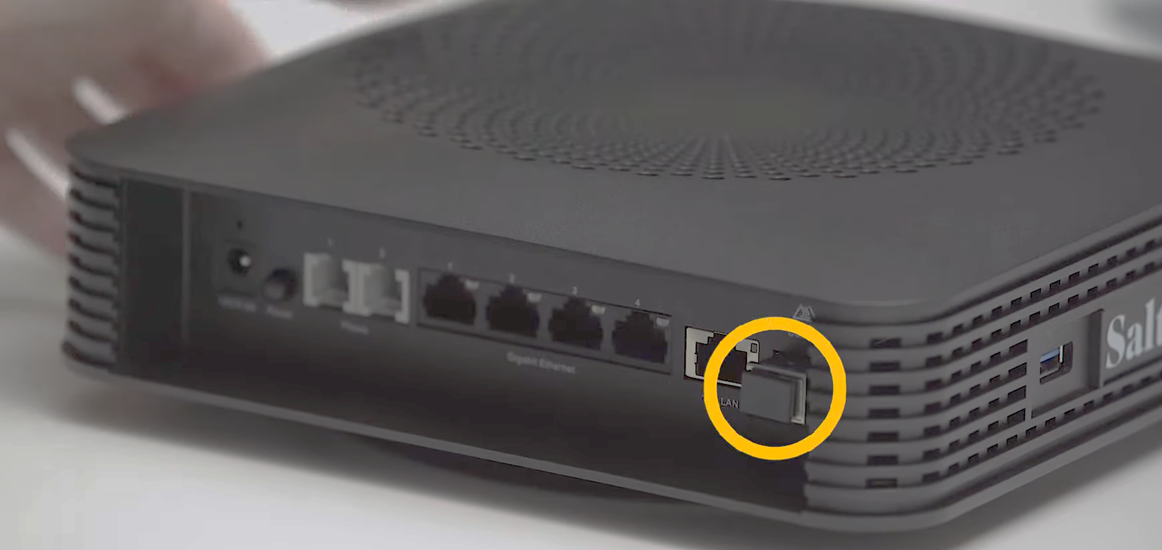
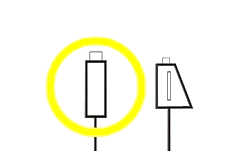
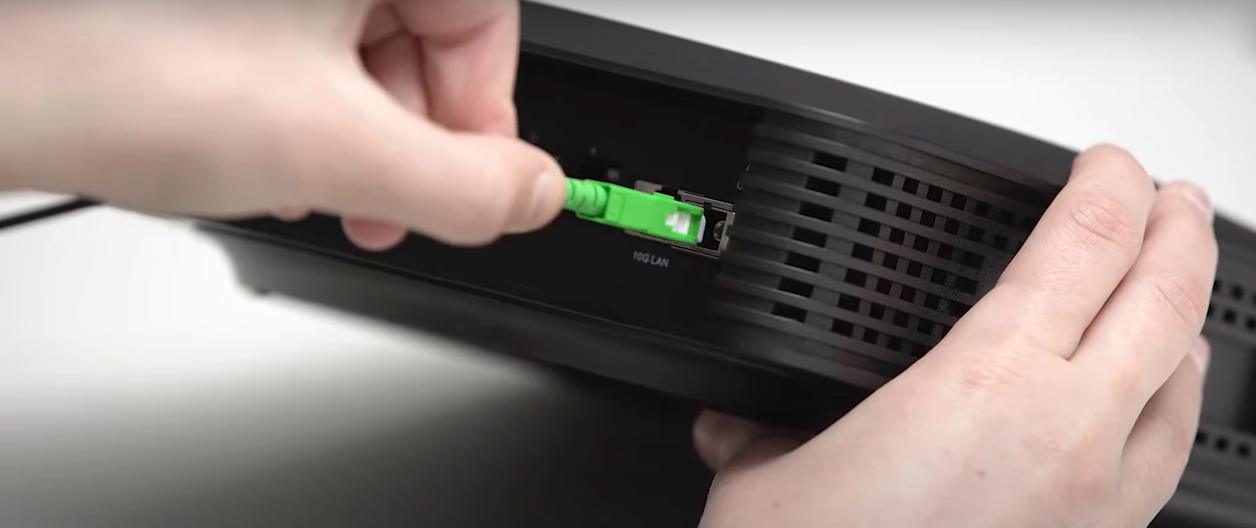
- Remove the cap of the Fibre port, which can be found on the right-hand side of the Fiber Box.
- Take the (smaller) rectangular end of the fiber-optic cable and remove the plastic cap, then place it into the Fibre port of the box, taking care to respect the direction of insertion. Ensure that the cable is firmly secured.
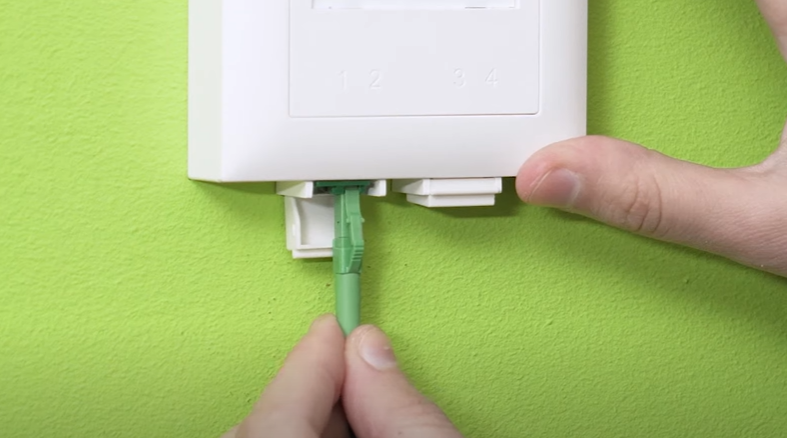
- For the next step, you will need to know which port on your fiber-optic outlet to use. You can find this information in the activation email you received (subject: Salt Home – Activation of your connection and services), or in your account (my.salt.ch -> Subscriptions -> Internet).
- Remove the cap from the (larger) triangular end of the fiber-optic cable. Do not touch the tip of the fiber-optic cable. Connect the triangular end of the cable to the fiber-optic outlet, using the correct port as specified in the previous step. The port is usually found on the underside of the outlet, and might be covered with a small plastic cover on a hinge. Pull this down to access the fiber-optic port if needed.
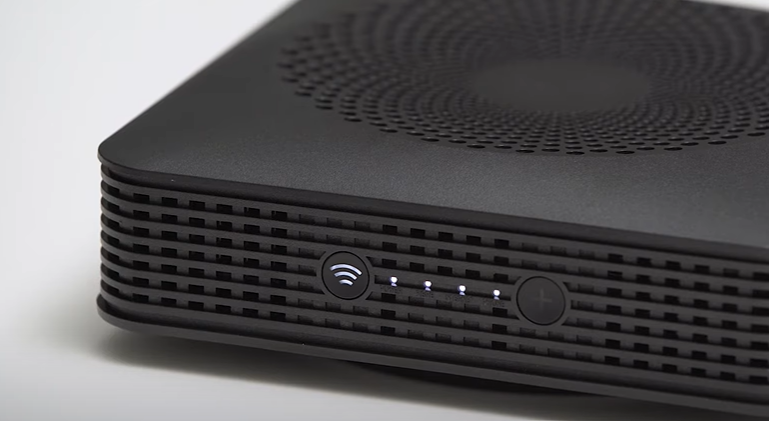
- Connect the power supply to the back of the Fiber Box and plug it into an electrical outlet. Then press the POWER button. The POWER LED will light up, followed by the FIBRE LED. Your box will then restart, and the LEDs will power off.
- Around ten minutes after the box restarts, all four LEDs should be on. Your box is now ready for use.
- To join the Wi-Fi network on your phone, you can scan the QR code on the “Welcome” card. For other devices, simply connect to the network with the name indicated next to SSID on the card (FibreBox_X6_XXX), and use the Wi-Fi password.
- If you want to access the advanced settings or change the Wi-Fi name or password, go to https://salt.box and connect using the password labeled “GUI Password” which can be found on the underside of the box (see step 1).
- Congratulations! Your Fiber Box X6 is configured and you are ready to enjoy your Salt Home subscription. If you have an Apple TV or a landline phone, you can now connect them.
- Don’t forget to set up your account!
Before starting the setup of your new Fiber Box, please take the following steps:
- Ensure your fiber-optic line is active. You will receive an email (subject: Salt Home – Activation of your connection and services) when your services are activated, and you can always check the order status on my.salt.ch.
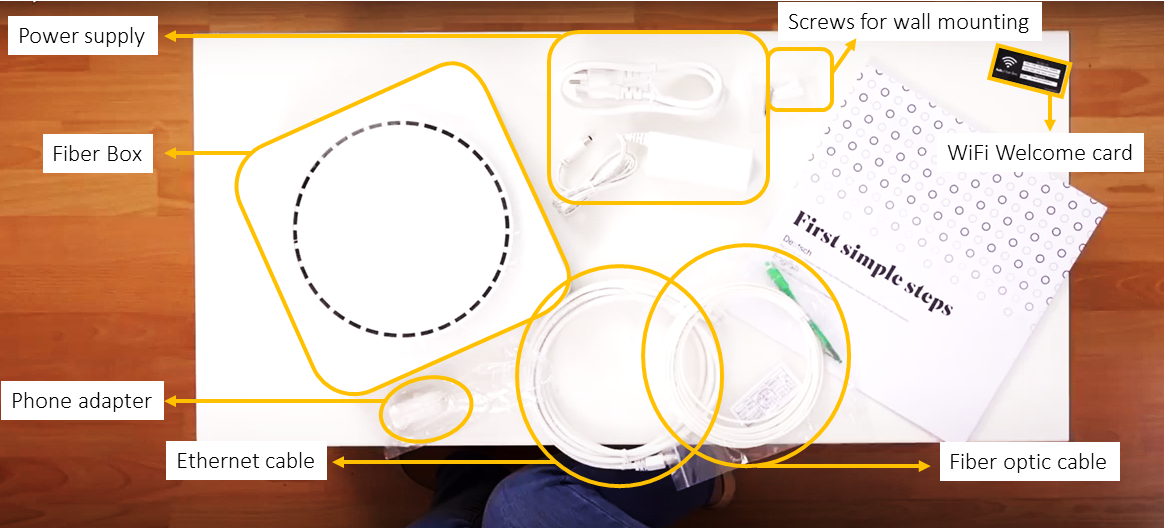
- Check to make sure the box contains the following:
- Fiber Box (white box)
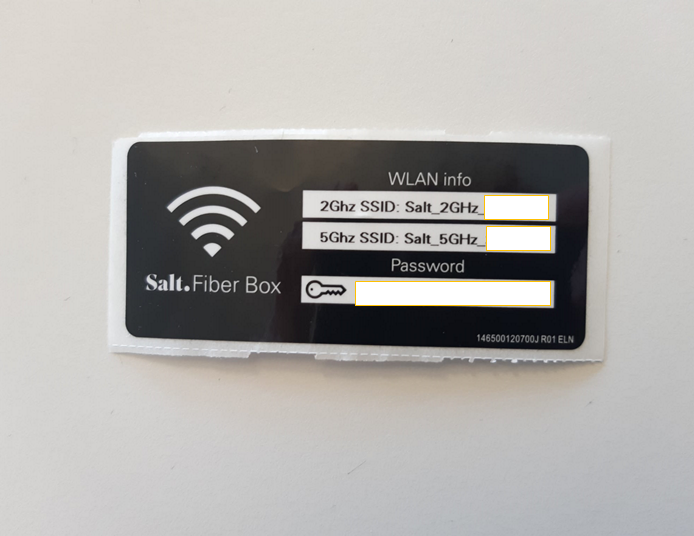
- Wi-Fi sticker with the connection details
- Fiber-optic cable
- Power supply
- Optional elements include:
- Screws for wall mounting
- Ethernet cable(s)
- Phone adapter
- Take the fiber-optic cable. This cable must be handled very carefully, as it is extremely fragile. If it is bent, the fiber inside will break and will prevent Internet access. You should place your Fiber Box close to the fiber-optic outlet to minimize the risk of damage. Never:
- Bend the cable
- Place it in a transit location
- Run it under a door
- Place it in a corner.
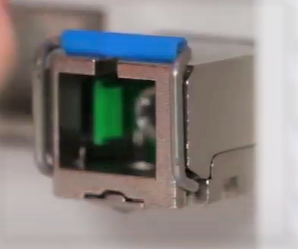
- Remove the cap of the FIBER port, which can be found on the right-hand side of the Fiber Box. Ensure the blue lever is positioned at the top of the port:
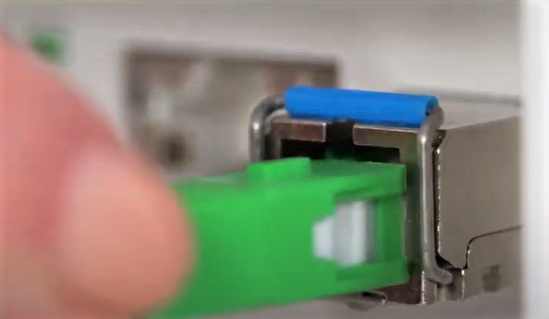
- Take the (smaller) rectangular end of the fiber-optic cable and remove the plastic cap, then place it into the Fiber port, taking care to respect the direction of insertion. Ensure that the cable is firmly secured.
- For the next step, you will need to know which port on your fiber-optic outlet to use. You can find this information in the activation email you received (subject: Salt Home – Activation of your connection and services), or in your account (my.salt.ch -> Subscriptions -> Internet).
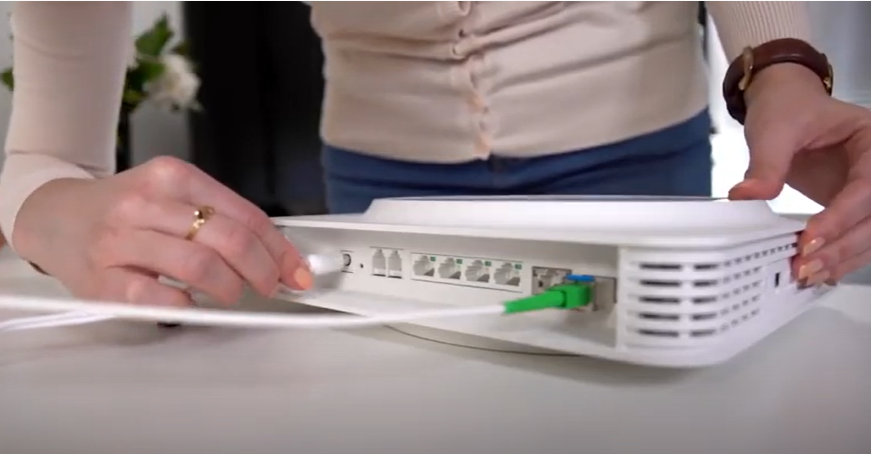
- Remove the cap from the (larger) triangular end of the fiber-optic cable. Do not touch the tip of the fiber-optic cable. Connect the triangular end of the cable to the fiber-optic outlet, using the correct port as specified in the previous step. The port is found on the underside of the outlet, and is covered with a small plastic cover on a hinge. Pull this down to access the fiber-optic port.
- Connect the power supply to the back of the Fiber Box and plug it into an electrical outlet. Your Fiber Box should automatically turn on. The LEDs will flash in different colors for two to five minutes as the box synchronizes.
- Once the LEDs labeled WWW and FIBER are turned on and the light is static, your Fiber Box is ready for use.
- To join the Wi-Fi network, simply connect to the network with the name indicated next to SSID on the card (Salt_XGhz_XXX), and use the Wi-Fi password.
- You can also connect a computer or an Apple TV using an Ethernet cable.
- If you want to access advanced settings or change the Wi-Fi name or password, go to https://salt.box while connected to the Fiber Box’s network and connect to the administrator console using the following credentials:
- Username: admin
- Password: admin
- Congratulations! Your Fiber Box is configured and you are ready to enjoy your Salt Home subscription. If you have an Apple TV or a landline phone, you can now connect them.
Before you get started
The box your equipment comes in should contain:
First, you should set up your antenna. For this step, you will need:
The box your equipment comes in should contain:
- 1x router (Huawei WiFi AX3)
- 1x antenna (Huawei 5G CPE Win)
- 1x SIM card
- 1x installation guide
- 1x HDMI cable
- 1x Apple TV 4K
First, you should set up your antenna. For this step, you will need:
- Huawei 5G CPE Win antenna
- The SIM card that came with your box
- The antenna itself
- A 10 m network cable
- A bracket to mount the antenna
- Two screws to secure the bracket
- An Allen key
- A power supply
- First, extract the nano SIM card (the smallest SIM card) from its casing. Then insert it into the antenna. The slot can be found on the narrow side of the antenna casing.
- Complete this step before turning on the antenna for the first time.
- Next, connect the network cable to the antenna and place the white lid attached to the cable on top of the ports.
- Use the Allen key to tighten the screws and secure the lid in place.
- Then take the other end of the network cable and connect it to the blue port of the power supply. Connect one end of the included power cable to the power supply, and plug the other end into a power outlet.
- Now bring your antenna outdoors, to a window or a balcony. The CPE antenna is designed to work outdoors. The best place is not more than 10 m from the window, so that the antenna can be mounted outside while the power adapter remains inside. The network cable is designed so that a door or window can be closed on top of it.
- Once this step is complete, switch on the power adapter. The two lights on the side of the antenna labelled “5G” and “4G” should automatically switch on. If this is not the case, please check the power supply, and make sure that the network cable is fixed securely to the power supply and the antenna. The table below describes what each light means. It can take up to 3 minutes for each light to turn green.
- Green: strong signal
- Yellow: medium signal
- Red: weak signal
- Before securing your antenna, you should set up your router. This is the easiest way to ensure that your Gigabox solution will help you reach the optimal speed. You should leave your antenna in as secure a location as you can, and avoid leaving it unsupervised on a window ledge, for example.
- Now, you will configure the Huawei AX3 router. In the box you should find:
- 1x Huawei AX3 router
- 1x power cable
- 1x network cable
- Take the router from the box and place its four antennas vertically. Take the network cable and connect it to the port on the router labelled WAN.
- Connect the other end to the LAN port on the antenna’s power supply.
- Now connect the power cable to the router’s power port, and plug the other end of the power cable into a power outlet. Turn the router and the power supply on. It may take a few minutes for the router’s Wi-Fi network to appear.
- Connect to the HUAWEI-XXXXX network which should appear using your phone or another device. The exact name of the network can be found on the sticker which is under the router. The first time you start the router, this network should have no password.
- If the home page does not launch, open your device’s browser and enter the address “192.168.3.1” into the address bar.
- Select the two check boxes and then click “let’s get started”.
- You can then set the name and password of your Wi-Fi network. You can also set the password of the router’s administration interface.
- Top tip! Use the same password for both, so you’re less likely to forget it.
- Select the “Backup WiFi 5 option” and click on “next”. Under “network mode”, select “IPv4 & IPv6” and continue.
- Your router will now reboot, and you will need to connect to the network using the network name and password you selected earlier. Now you should be connected to the internet!
- Now return to your antenna. Using a device which is connected to the router’s Wi-Fi network, go to speedtest.net and perform a speed test.
- If the speed is above 60 Mbit/s, you should now return to your antenna to finalise the placement.
- If the speed is between 30 and 60 Mbit/s, you should be able to watch TV and surf the Internet with no issues. You can still return to your antenna and try to move it if you want to improve your speed.
- If the speed is below 30 Mbit/s, Salt TV may not work smoothly. You should return to your antenna and move it to a new location. Sometimes a small difference in placement makes a big difference in signal speed. Each time you move your antenna, you should wait 30 seconds before testing the speed again. If one side of your building doesn’t allow you to get an acceptable speed, try another side.
- If you cannot find an antenna placement which allows your speed to exceed 30 Mbit/s, please contact our customer service hotline: 0800 700 500.
- When placing your antenna, either screw the provided bracket to a wall or mount the bracket to a pole or rail. Then attach the antenna to the bracket.
- Finally, enjoy your new Gigabox, and don’t forget to set up your account!
- Connect your Apple TV.
- Connect the power cable to the Apple TV and to an electrical outlet.
- Turn on your TV.
- Connect an HDMI cable to the Apple TV and your TV.
- If your Internet box is nearby, connect it to your Apple TV via Ethernet cable (not included) to ensure better stability and easier installation.
- If the welcome screen does not appear automatically, take the remote control of your TV. Select the HDMI input to which you have connected your Apple TV on your TV.
- This is often done using the "SOURCE" or "INPUT" button.
- When you are on the welcome screen, you can move on.
- For the rest of this process, you will no longer need your TV remote control.
- Place the Salt remote control 10cm away from the Apple TV and press the "POWER" button on the remote control.
- If nothing happens when you try to navigate with the Salt remote, press the menu button and the middle button at the same time.
- Follow the installation steps suggested on the screen.
- If your Apple TV is not connected to your box via Ethernet cable, you will need to connect to Wi-Fi.
- Choose the Wi-Fi of your box and use the remote control to enter the password.
- To find out which Wi-Fi network belongs to your box, consult its installation guide.
- Be careful! You must not connect via Ethernet and Wi-Fi! If you wish to use an Ethernet (LAN) connection afterwards, you must disconnect from Wi-Fi.